...
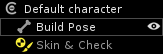
When opening an empty scene, a “Default character” is available and ready to use. This character contains a Build Pose (where you will create/edit your skeleton) and a Skin & Check mode (to bind your skin at that moment).
Note title Skin & Check mode before skin bind In this starting context, meaning when your mesh is not yet bound to your skeleton, the Skin & Check mode is mostly used to make the binding process. You can, nevertheless, check your joint position and orientation if needed.
From now on, you create and edit your skeleton in Build Pose.
Note title Joint creation under the Default character Please notice that, by default, the joints you create will be automatically created under the Default character. If you want to create them under another character, you have to select this character first.
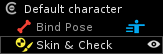
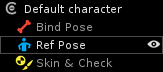
- Then, go in Skin & Check mode and bind your mesh to your skeleton, the Build Pose is replaced by a Bind Pose. A Ref Pose equal to the Bind Pose is created (both icons are visible on the pose's row). It's the reference pose for the animations.
If you want or need to set a custom Ref Pose, go in Skin & Check mode, put your model into the desired posing and click on the “Create Ref Pose” button.
Note title Can i remove a custom Ref Pose? If you decide you actually don't want a custom Ref Pose, just hit the Delete Ref Pose button. You will return to the previous state, meaning the original Ref Pose equal equals to the Bind Pose. In case of existing animations, as explained above when coming back to the Animation mode a popup window will propose you to convert (or not) your animations…
...