
The Skin Painter (or Paint weights tool) allows you to paint directly the skinning weights on your 3D model using a 2D brush. In case of vertex selection, the Skin Painter area is limited to the selected vertices.
...
 Add/Remove Mode (Shortcut: Z): By using LMB, this paint mode adds weight (value set into the weight slider) to the current influence while by using RMB, it removes weight from thecurrent the current influence. In this mode, the strength value acts as an opacity factor. For instance, in case of Weight=1 and Strength=0.25 (displayed .25), each stroke will add or remove 0.25 of weight.
| Tip | ||
|---|---|---|
| ||
You can do it very easily by using the Painter Add/Remove mode. First select the target influence and then the source one in the Picker (all the other influences will remain locked). Remove all the weights from source influence using the Remove mode (RMB). All the source weights are now transfered on transferred to the target influence. |
 Target Mode (Shortcut: E): This paint mode targets the weight (value set into the weight slider) for the current influence. Depending on the strength value, you will need more or less brush strokes to (eventuallypossibly) reach the weight value. Please note that for Strength=1 the weight value will be reached at the first stroke. A value inferior to 1 (usefull useful to smooth an area without never exceeding the targeted value) does not assure to reach the exact value.
 Smooth Mode (Shortcut: R): This paint mode smooths out the weights of the current influence depending of neighbour on neighbor vertices. This paint mode does not consider the weight value. Depending on the strength value, you will need more or less brush strokes to smooth out the weights.
 Select/Deselect Mode (Shortcut: T): By using LMB, this paint mode selects vertices while by using RMB, it deselects vertices. This mode does not consider the weight or strength values. You can combine Paint paint selection and vertices picking (using Shift) simultaneously. The brush profile type does not affect the selection: whatever the brush, all the vertices located inside the brush will be concerned.
| Note | ||
|---|---|---|
| ||
If the "Full “Full Paint & Vertex Select Mode" Mode” is enabled, all vertices inside the brush will be concerned. If disabled, only front vertices will be concerned. |
...
 Full Paint & Vertex Select Mode (Shortcut: Q): If enabled, this mode allows to paint all the vertices inside the brush (front, back, far, etc.) By default, this mode is disabled, providing a classic paint mode, meaning front vertices only.
| Note | ||
|---|---|---|
| ||
When this special mode is enabled, the paint brush widget as well as the vertex select cursors (pick/rectangle and lasso) are turned in red color to clearly inform the user. Of course, using this mode with textured shading display will affect vertices you are not able to see! |
...
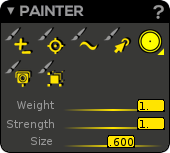
 Strength slider: Strength is a factor altering the amount of weight treated by a brush stroke. In the Add/Remove case, strength acts as an opacity factor, meaning that if Strength=1 the weight value will be applied while if Strength=0.5 (or .5) half the weight value 's half will be applied. In Target case and for a new influence (initial weight=1), if Weight=1 and Strength=0.5, successive brush stroke results will be 0.5, 0.75, 0.875, etc. In Smooth case, strength defines how much the smoothing is applied. You can enable a slider step mode into the Skin Atelier options.
...
| Info | ||
|---|---|---|
| ||
You can enter values into sliders by double-clicking into them! |
Weight Colour Ramp
1  0
0
Skinning colour Skinning color feedback goes from yellow (1 value /for vertex fully affected) to blue (near to 0 value - for vertex unaffected). When you select a joint, the displayed colour color feedback shows the actual skinning weights representing the joint influence.
| Info | ||
|---|---|---|
| ||
| In Rigging rigging part, even if you select several joints, you will only see skinning colour color feedback on the last selected joint. This comes in handy when properly editing skinning weights. |
...
In Akeytsu, our goal is to merge completely our different skinning workflows, meaning the Skin Painter and the Skin Numeric Field Editing. The Skin Atelier design allows to work the same way with or without selected vertices. In this way you are able to paint your weights and select/edit your vertices without slowing down your workflow. To this end, we defined some important influence lock rules and weight share rules. Let’s discover akeytsu’s rules.
...
Selecting influences (or joints) automatically unlocks them and locks* the unselected influences. However, there is an exception. If you select one and only one influence (without vertex selection) you will notice the unselected ones are exceptionally unlocked. We call it the Free mode.
...
In case of unlocked new influences only (please note, we can only add a new influence per vertex at a time),
...
If there are many ones, akeytsu will choose (per vertex and according to the vertex position) either the father influence or a child influence, to receive weights. It is the case when you remove "1" “1” weight vertices without selecting an other another influence to receive weights.
...
You access the specific preferences of the Skin Atelier by clicking the cogwheel at in the top right corner of the window.
[Painter] Weight step: Enable or disable a "step" (or snap") “step/snap” when you move the weight slider. You define this step into the corresponding "Step value" “Step value” field.
[Painter] Strength step: Enable or disable a "step" (or snap") “step/snap” when you move the strength slider. You define this step into the corresponding "Step value" “Step value” field.
Sweep below: Weight value threshold used by the "Sweep Weights" “Sweep Weights” command.
[Painter] Hide 3D manipulators if skin painter turned on: If enabled, this feature will hide the 3D gizmos while skin painting stage.
Allow to mirror mirroring weights on different skinned meshes: If enabled, even if the source point and the target point of the mirror do not belong to the same mesh, the algorithm still mirrors the source point at the target point.
Max inf.pr vtx: The Duo Skin algorithm and the Skin Painter algorithm will associate at maximum to each vertices vertex the number of joint specified.
Low smooth strength (recommended for face): Strengh Strength associated to the joint tagged as low in the picker. The strengh strength modifies the smoothing of the skinning. This is a Duo Skin preference.
High smooth strength (recommended for body): Strengh Strength associated to the joint tagged as high in the picker. The strengh strength modifies the smoothing of the skinning. This is a Duo Skin preference.
Negligible inf: The weight below this value will be erased with the Duo Dkin Skin algorithm and the Skin Painter algorithm.
...