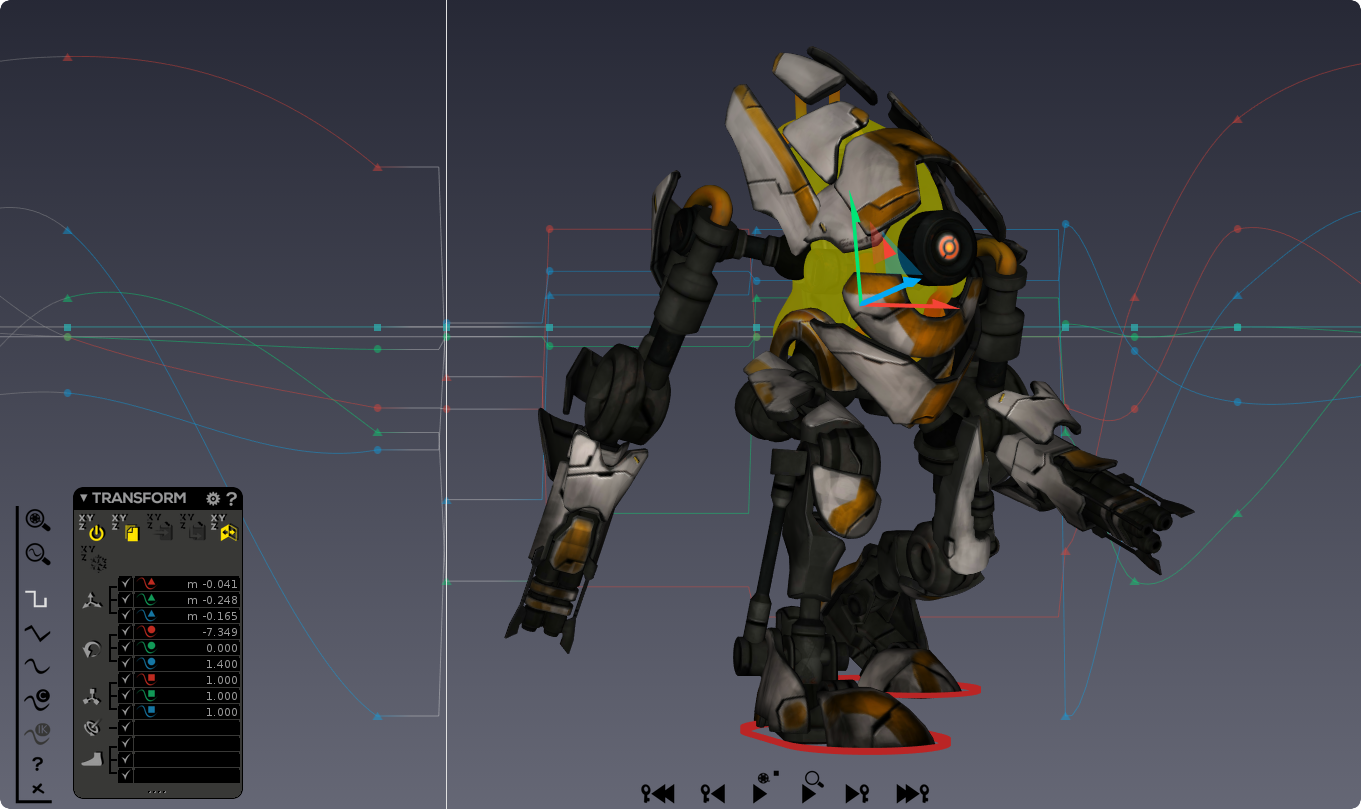


The Curveboard is Akeytsu's F-Curve editor and is fully integrated into the 3D viewport and accessible via the Timebar.
| Actually, Timebar and Curveboard can be seen as merged. You may consider that the Timebar is the remaining visible part of the Curveboard when this one is disabled. |
You activate the Curveboard by clicking on  (Shortcut: Spacebar).
By default, curves are in the background but when you select them, they come to the foreground and in front of the character, surrounding it.
For users who prefer to work with a Curveboard separate from the 3D viewport, we have got a special layout “2 views - Curveboard” (press F3). |
To emphasize visibility, we designed curves and keyframes the following way:
 round keys represents Rotation curves
  triangular keys represents Move curves
 square keys represents Scale curves
 diamond keys represents Pole angle curves
 split diamond keys represents Roll angle curves
 sliced diamond keys represents Twist angle curves
 cut diamond keys represents Bank angle curves
 little camera keys represents Camera FOV curve
When the CurveBoard is active, the Transform window slightly changes to offer channels visibility management : the key icons ( |
The Curveboard displays keyframe values in Local Relative (to Ref Pose) coordinates (). |

You may select curves and their components (keyframes, tangents) by LMB clicking/rectangle + Shift.
You may add curves or components to your selection by LMB clicking/rectangle + Ctrl.
You may remove curves or components from your selection by LMB clicking/rectangle + Alt.
When a selection is made, key handles will be displayed.
Rotation keyframes do not have handles, as we support only quaternion interpolation for the moment. However, we display dots instead of handles allowing to select keyframe sides to change their interpolation type. |
When you begin editing curves or keyframes values, a vertical values scale appears in 3D Viewport providing actual value feedback.
You may increase curve or keyframe values by LMB click + drag Up + Shift.
You may decrease curve or keyframe values by LMB click + drag Down + Shift.
You may scale up a curve by RMB click + drag Up + Shift.
You may scale down a curve by RMB click + drag Down + Shift. Please notice that the scale result will depend on your mouse cursor position when you start to drag.
| You can not change keyframe position (time) in the Curveboard but only values. That is why editing is limited to Up/down axis. Right/Left operations (timing) must be done using the according features in Timebar or Stacker. |
You may pan the Curveboard vertically by MMB click + drag Up/Down + Shift in empty space.
You may resize the Curveboard vertically by RMB click + drag Up/Down + Shift in empty space.
| Curveboard panning & resizing is limited to Up/down axis. Right/Left operations must be done using Timebar features. Please notice that the resize result will depend on where is your cursor position when you start to drag. |
 Frame Full Animation: Like the framing option of the Minibar, this feature frames curves in the 3D Viewport depending on highest and smallest values of all the displayed curves, regardless of current selection.
 Frame Key Range: Like the framing option of the Minibar, this feature frames curves in the 3D Viewport depending on highest and smallest curve values of the selected keys (keys selected on curves).
 Stepped Interpolation: This interpolation mode is direct from a key to another, while preserving their timing. Excellent for snappy animations or the first block-out pass. This mode is helpful to focus on posing and timing of your keyframes
 Linear Interpolation: This interpolation mode creates straight segments between neighbor keyframes.
|
 Spline Interpolation: This interpolation mode creates smooth curves. It is usually the default interpolation mode in 3D animation software.
 Clamped Interpolation: This interpolation mode flattens the curve between neighbor keyframes when their values are identical.
 Auto IK Interpolation: It is the default interpolation mode for IK and Reverse Foot (RF) targets. In this mode, the curve interpolation between two neighboring keys automatically switches between Spline, Clamped and Linear depending on the IK/FK combination, and the key values set on those keys. Spline is the default mode. Other modes are activated in the following cases :
|
 Disable Curveboard : Close the curveboard

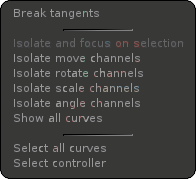
You access this menu anywhere on the 3D viewport by RMB clicking + Shift:
Break tangents: Break the selected keyframe handle. When you break tangents, the handles are displayed as dotted lines. Once broken, you can re-unify them if needed by changing their profile to Spline or Clamped.
| Rotation keyframes do not have handles, as we support only quaternion interpolation for the moment. However, we display dots instead of handles, allowing to select keyframes sides to change interpolation type inside a keyframe selection. |
Select controller: Select (in Picker) the controller depending on the curve.
| This feature is particularly efficient when the screen is filled with curves, and you notice a curve needing to be fixed. But you do not know its associated joint. |