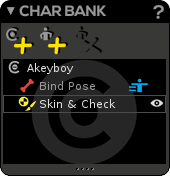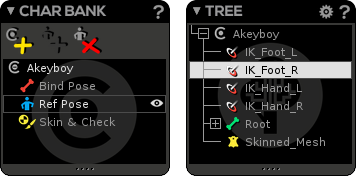


The Character Bank is the window managing the Character(s) in the current scene.

The Character (![]() ) is a very important node, under which all components of an animated model are parented (skeleton, skinned mesh, mesh, IK targets, etc.).
) is a very important node, under which all components of an animated model are parented (skeleton, skinned mesh, mesh, IK targets, etc.).
In the Character Bank, you access the different modes/states of the character while in the Tree window, you can see the character hierarchy with its components.
| In Akeytsu, you can not make animations and animated models without using character nodes! If you move components outside the character, animations and/or animated model will be damaged. |
To better understand what is a Ref Pose and how it works with the Bind Pose, let's do this simple observation:
|

Now let's discover our with three different modes/states:
 Bind Pose: The Bind Pose is the state of your skeleton at the moment you bind your skinning. It is the dedicated pose to edit your joints/pivots and create IKs or Reverse Feet during the character creation process. When you transform your joints in this pose the mesh will not be affected and remain static.
By default, an empty character does not have a Bind Pose, but a Build Pose( |
If you take a look at the Transform window when in Bind Pose, you will see that channels values are displayed in World coordinates ( ). ). |
The Bind Pose is the only mode where the skinning decorator (on the skinned mesh) is not displayed. |

 Reference Pose (or Ref Pose): In Akeytsu, animation keys are computed relatively to a special pose called Ref pose. It is the pose you return to when you reset all joints/all channels on an animation keyframe (Animation Part). Transformations undergone by joints during the animation are recorded (in keys) as differences from the Reference pose. If the Reference pose moves, all the animations move in the same way. Therefore, it also is your starting key pose when you create an animation.
When you bind your mesh to your skeleton, a Ref Pose equal to the Bind Pose is created by default ( |
A custom Ref Pose ( |
If you remove, modify or even add a custom Ref Pose, it will impact more or less your animations. In order to fix this issue, when coming back into the Animation mode a popup window will propose you either:
|
If you take a look at the Transform window when in Reference Pose, you will see that channels values are displayed in Local coordinates ( ). ). |
 Skin & Check mode: The Skin & Check mode is the state where you bind your skinning, edit your skin weights and check the final result by transforming your joints.
If you take a look at the Transform window when in Check Pose, you will see that channels values are displayed in Local Relative coordinates ( |
 Create Character: Add a new character in the current scene. A Build Pose and a Skin & Check mode are created by default. When created, the (last) character node is always selected, so you can start building your skeleton.
 Create Ref Pose: Add a custom Reference Pose to the current character.
 Delete Ref Pose: Remove the custom Reference Pose and let the Bind Pose act as Ref Pose
When opening an empty scene, a “Default character” is available and ready to use. This character contains a Build Pose (where you will create/edit your skeleton) and a Skin & Check mode (to bind your skin at that moment).

In this starting context, meaning when your mesh is not yet bound to your skeleton, the Skin & Check mode is mostly used to make the binding process. You can, nevertheless, check your joint position and orientation if needed. |
From now on, you create and edit your skeleton in Build Pose.
Please notice that, by default, the joints you create will be automatically created under the Default character. If you want to create them under another character, you have to select this character first. |

If you want or need to set a custom Ref Pose, go in Skin & Check mode, put your model into the desired posing and click on the “Create Ref Pose” button. 
| If you decide you actually don't want a custom Ref Pose, just hit the Delete Ref Pose button. You will return to the previous state, meaning the original Ref Pose equals to the Bind Pose. In case of existing animations, as explained above when coming back to the Animation mode a popup window will propose you to convert (or not) your animations… |