
The Skin Painter (or Paint weights tool) allows you to paint directly the skinning weights on your 3D model using a 2D brush. In case of vertex selection, the Skin Painter area is limited to the selected vertices.
...
| Tip | ||
|---|---|---|
| ||
You can do it very easily by using the Painter Add/Remove mode. First select the target influence and then the source one in the Picker (all the other influences will remain locked). Remove all the weights from source influence using the Remove mode (RMB). All the source weights are now transfered on the target influence. |
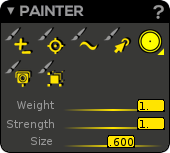
 Target Mode (Shortcut: E): This paint mode targets the weight (value set into the weight slider) for the current influence. Depending on the strength value, you will need more or less brush strokes to (eventually) reach the weight value. Please note that for Strength=1 the weight value will be reached at the first stroke. A value inferior to 1 (usefull to smooth an area without never exceeding the targeted value) does not assure to reach the exact value.
...
Allow to mirror weights on different skinned meshes: If enabled, even if the source point and the target point of the mirror do not belong to the same mesh, the algorithm still mirrors the source point at the target point.
Max inf.pr vtx: The Duo Skin algorithm and the Skin Painter algorithm will associate at maximum to each vertices the number of joint specified.
...