Skin Atelier
- Aurélien Charrier
- Etienne Beschet
- Yannick Rousseau (Unlicensed)

The Skin Atelier is meant to manage skinning weights, meaning by that: Bind, Edit and Mirror your skinning weights.
This window is divided in 2 different parts:
- The upper part concerns the Duo Skin features (Bind Skin, Auto Smooth) as well as Mirror Skin, Copy Skin and few other features
- The down part concerns the Skin Numerical Field Editing
Let's start with the middle part!
Paint & Check mode
All skinning operations must be performed into the "Paint & Check" mode of the Character Bank ( ). It means, that these skinning commands are disabled in Bind Pose, Build Pose or Ref Pose
Shift, an essential key during your skinning process
In Rigging/skinning mode, the Shift button (eventually combined with Ctrl and Alt) is a very important key as it allows you to grab your vertices using pick/rectangle selection (LMB) or using lasso selection (MMB). More details about the vertex selection lower in this page.
Check your mesh transformation values before skinning
Before starting skinning or updating your meshes (using the "Update Skinned Mesh" feature), please always check that your mesh transformation values are set to 0,0,0. That will prevent any potential coming issues (in Akeytsu, export warning or issues on export, etc.). You can use the "Reset'n'Freeze" feature available in the Transform window to reset your values.
Duo Skin and other skin features
The Duo Skin process is our new automatic skin workflow developed to provide (far) better and quicker results.
This process is called « Duo Skin » as it is split in 2 different steps:
- During the 1st step Akeytsu will bind in rigid your mesh(es) to your skeleton
- Then (2nd step), Akeytsu will perform smoothing over 1st step influences
About How our skinning works
Since we use Geodesic Voxels during the 1st step, the skinning should already looks good enough. Experts may still want to tweak and adjust some areas by going back and forth between 1st (rigid) and 2nd steps using the Duo Skin Mode button.
How to use it ?
- First of all, use Ctrl+Left Click to gather both desired mesh(es) + desired joint(s). To select the character, go in the Tree window, to select joint(s), it's often easier to parse the picker window (instead of expanding the whole tree hierarchy),
- hit the Bind Skin command. It will (pre)bind in rigid your selected mesh(es) to your selected joints and then automatically perform a smoothing straight afterwards. From that moment, you already get your smoothed skin.
- If you are pleased with the result you can stop here!
- If you want to adjust your skinning, you have got two solutions:
- Easy & Quick: go back into the Rigid step (by using the Duo Skin Mode button), manually refine your rigid skinning zones (using rigid tools only) and hit the Process Smooth Skin button to perform a new auto-smooth pass.You can then iterate the process on the full skinning or on specific parts as well as setup each joint smoothing strength in front of each one in the Picker window
- Longer: stay into the Smooth step and manually refine your smooth skinning zones (using smooth tools)
Now discover the features more in details!
The following video not yet up-to-date and still describes the previous way to use Duo Skin. We plan to update it as soon as possible. Thanks for your understanding.
 Skin Painter (Shortcut: A): Enable/disable the Painter window toolset
 Bind Skin: Bind in rigid the selected meshes to the selected joints and auto-smooth the whole influences straight forward.
 Process Smooth Skin: Generate smooth (end) skin from rigid (start) skin according to your joint selection (and potentially vertex selection) as well as the smooth factors displayed into the Picker (once the skin is pre-bound).
What about true rigid characters such as robots or machines?
For this kind of characters, you need to turn "off" the smooth factors - by clicking on the smooth factor icon into the Picker - on all joints before launching the smooth/bind process. Then it will bind/finalize your skinning without smoothing it!
 Duo Skin Mode: Display and edit either rigid (start) or smooth (end) skin.
Rigid weights only in 1st step
Please note that in 1st step (Rigid mode) of the Duo Skin Mode, your skinning is just a "pre-skinning" (a kind of blueprint). Since then, it's not allowed to smooth influences so only "rigid" tools are available.
 Unbind Skin: Unbind the current skinning, meaning that your skinned mesh(es) return(s) to mesh(es) state. By the way, another method to unbind your skinning is to drag'n'drop your skinned mesh(es) outside the Character node into the Tree window.
 Hide Skinned Mesh Vertices: Hide the faces corresponding to the selected vertices. Very useful to skin from the inside of the model or to hide the empty side when you work on your half skinning.
How about adding new vertices to hide?
Once you already hide vertices and in case you make a new selection of vertices, you will notice a little "+" sign appears into the command. At that time, if you hit the command again, this new selection of vertices will be added to hidden vertices. Quick, simple & efficient!
 Mirror Skin Weights & Joints: Mirror the skinning weights and the joints in same time. Please notice that the mirroring process works according the YZ plane and the (side) joints must have the following tags in their names : r_/l_/R_/L_ as prefix, or _r/_l/_R/_L as suffix or even right/left/Right/Left anywhere in the name. Then select the side you want to mirror and hit the command. If the joints already exist on the other side, only weights will be mirrored.
Mirroring only joints?
If you go into Bind (or Build) Pose, you will notice that the Mirror command remains enabled and allows to mirror joints only. It displays a slightely different icon .
.
How to mirror a specific part of skinning weights?
First select a joint of the source side (needed to determine the "side to mirror"), then select vertices on the destination side. The mirroring effect will be limited to this vertex selection.
Different mirroring rules between weights and joints
- The "Mirror Joints Only" works in a "selective" manner, meaning that you select a joint you want to mirror on the other side and only this joint (and its potential fathers) will be mirrored.
- The "Mirror Weights" works in a "global" manner, meaning whatever the joints you select (to determine the side to mirror), all vertices will be computed.
- The "Mirror Weights & Joints" works logically both manners, "selective" concerning joints and "global" concerning weights. That is why, for simplicity, we recommend to select all side (or all half rig) to mirror all your character (all joints/all weights).
Valid skeleton naming
- First, be aware that, in Akeytsu, the objects found under a skeleton are joints, not bones.
- Joints which have a mirroring counterpart in the skeleton must be "side-tagged" (as described above)
- The other joints must be "not-side-tagged" =>
- Central joints must be "not-side-tagged"
- Joints which must not be mirrored must be "not-side-tagged"
- To get a valid skeleton (by valid, we mean that Akeytsu mirroring algorithm will correctly run with such skeletons), a strong rule is:
- A "not-side-tagged" joint must never be found between a "side-tagged" ancestor and a "side-tagged" descendant
- Know that, when mirroring is called, if needed, Akeytsu will log that the skeleton has not a valid naming, and will return immediately (doing nothing)
Mirroring requirements
It is important to remind that our mirroring features (including the cyclemaker features) works if:
- The skeleton is correctly named/labelled (details above)
- The Bind Pose/Ref Pose of the skeleton was was obtained via our rig mirroring process
It means that if you bring your skeleton from another 3D package, it may be possible that you encounter some issues due to different axis orientation. In order to fix them, please delete a side of the skeleton and let Akeytsu mirror it.
 Update Skinned Mesh: Allows you to quickly replace the existing skinned mesh by an unbound (new) one. The tool will smartly transfer all weights to the new model and remove the old mesh. If you want to keep your old mesh, you need to duplicate it and select only one of your two copied meshes, then your new un-skinned model and finally execute this command
Update skinned mesh use cases
This feature is especially useful if you want to update your model topology, UV Coordinates, Vertex colors, Materials, and/or Textures. This is a simplification of the copy/paste feature
Check your mesh transformation values
Before updating your meshes, please always check that your mesh transformation values are set to 0,0,0. That will prevent any potential coming issues (in Akeytsu, export warning or issues on export, etc.). You can use the "Reset'n'Freeze" feature available in the Transform window to reset your values.
Texture information
As, internally, Akeytsu doesn't delete duplicated textures (which can lead to quickly increase your file size), we recommend that the new meshes don't have media imported with.
How to use Update Skinned Mesh
- Ensure you're in the rigging layout
- Also be sure you've selected the Paint & Check mode (Char Bank window)
- Select a skinned mesh
- Hold Ctrl and add one or more unbound meshes to the selection (these should correspond at some point to what is already skinned, dont make this between a mountain and a cow unless you really find it wise)
- Hit the update skinned mesh button...that's it !
 Copy Weights: Copy weights values of the selected vertices.
Copying one vertex versus copying many vertices (skin)
- If you copy one vertex you can paste its weights on other vertices of the same skinned mesh.
- If you copy more than one vertex, you are in "Copy Skin" mode, meaning that you have to paste their weights on another skinned mesh.
Prefer the Full Vertex Select Mode
For your Copy/Paste actions we recommend to work with Full Vertex Select mode activated ( ). This way, you will be sure to select and work on all displayed vertices.
 Paste Weights: Paste the previous copied values onto the current selected vertices.
How to use Copy Paste Skin feature?
 Fix Weights: Average weights on the selected vertices according to neighbour vertices.
 Sweep Weights: Clean very small weights on the selected vertices. The threshold is available into the Skin Atelier preferences.
 Full Select Mode: If enabled, this mode allows to select front and back vertices using pick/rectangle mode and lasso. By default this mode is disabled, providing a classic paint mode, meaning front vertices only.
White or Red!
When this special mode is enabled the paint brush widget as well as the vertex select cursors (pick/rectangle and lasso) are turned in red color to clearly inform the user. Of course, using this mode with textured shading display will affect vertices you are not able to see!
Slider alternative use
You can enter values into sliders by double-clicking into them!
Skin Numerical Field Editing
This part of the Skin Atelier allows you to work directly with your vertices, meaning selecting them and entering numerical values and/or using the Weight Ramp.
The following features require, of course, that a vertices selection has been made beforehand.
Pick/Rectangle Vertex Selection:
- Select vertices: LMB clicking (or rectangular selection) + Shift
- Add to vertex selection: LMB clicking (or rectangular selection) + Ctrl
- Remove from vertex selection: LMB clicking (or rectangular selection) + Alt
Lasso Vertex Selection:
- Select vertices: MMB clicking and dragging + Shift
- Add to vertex selection: MMB clicking and dragging + Ctrl
- Remove from vertex selection: MMB clicking and dragging + Alt
Other Vertex Feature:
- Increase vertex selection region: "+"
- Decrease vertex selection region: "-"
- Select all vertices: "*"
- Invert vertex selection: "/"
A joint or a character must be selected to allow vertex selection
Please select first a joint of your character - or even the character itself - to allow vertex selection on the corresponding skinned mesh(es). If you select directly the skinned mesh (into the Tree) you won't have the ability to select its vertices...
Last selected vertex feedback
Suggested render mode in skinning
Weight Ramp:

The Weight Ramp allows to quickly add or remove weights on the current influence (or joint).
As for the circular Spinner, you click on the "spinning" area and drag Up to add weight and drag Down to remove weight. Increasing and decreasing speed depends on the step value displayed in the Ramp. You may change this value by double-clicking in it.
Influence automatic exit
Weight normalization
Please keep in mind that weights are always normalized in akeytsu, so you are not able to put values above 1.
Influences & Vertices Editor:
In this compact editor, you may see and edit your unlocked working influences (or joints) as well as edit your vertex weights.
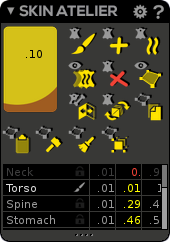
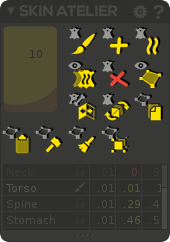
Influences:
On the left side you may find the influences you directly selected in the Picker or the 3D Viewport, or the influences you indirectly selected by selecting their vertices. Indeed selecting vertices make their corresponding influences enter directly in the editor. When you select an influence, this one is automatically unlocked and enters the editor while those missing remain locked into the Picker. You may lock/unlock influences only in the editor. The current influence is highlighted in white color and displays the painter icon. Influences are ordered in the same way as in the Picker for consistency.
Making a RMB click on an influence's name displays an additional menu:
- Select partner influences: Selects (so unlocks) all the influences sharing weights with the current influence.
- Select influenced vertices: Selects all the vertices of the current influence.
- Attach selected vertices: Sets the selected vertices to 1 value for the current influence.
- Select vertices influenced by all selected influences: Selects (so unlocks) all the influenced vertices of all selected joints
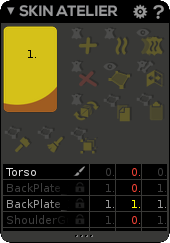
Vertices Editor:
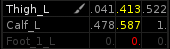
In case of vertex selection, you may find on the right side of the editor three values columns corresponding to vertex weights:
- The central column displays weight values of the last selected vertex. This column is the only one you may edit (by entering numbers or by using the Weights Ramp).
- The left column displays the minimum weight values of the vertex selection.
- The right column displays the maximum weight values of the vertex selection.
Influence Lock Rules & Weight Share Rules
In Akeytsu, our goal is to merge completely our different skinning workflows, meaning the Skin Painter and the Skin Numeric Field Editing. The Skin Atelier design allows to work the same way with or without selected vertices. In this way you are able to paint your weights and select/edit your vertices without slowing down your workflow. To this end we defined some important influence lock rules and weight share rules. Let’s discover akeytsu’s rules.
Influence Lock Rules:
Selecting influences (or joints) automatically unlocks them and locks* the unselected influences. However there is an exception. If you select one and only one influence (without vertex selection) you will notice the unselected ones are exceptionally unlocked. We call it the Free mode.
Selecting vertices automatically unlocks their corresponding influences.
* Lock an influence: weight editing will not affect this influence
Weight Share Rules:
If you add weights, you grab it from unlocked influences in proportion.
If you remove weights,
In case of unlocked new influences only (please note we can only add a new influence per vertex at a time),
If there is only one, this influence is chosen to receive weights.
If there are many ones, akeytsu will choose (per vertex and according to the vertex position) either the father influence or a child influence, to receive weights. It is the case when you remove "1" weight vertices without selecting an other influence to receive weights.
In case of unlocked new influences and partner influences***, leaving weights return in proportion to partner influences only.
***Partner influence: influence sharing weights with the current influence
Skin Atelier/Painter Preferences
You access the specific preferences of the Skin Atelier by clicking the cogwheel at the top right corner of the window.
[Painter] Weight step: Enable or disable a "step" (or snap") when you move the weight slider. You define this step into the corresponding "Step value" field.
[Painter] Strength step: Enable or disable a "step" (or snap") when you move the strength slider. You define this step into the corresponding "Step value" field.
Sweep below: Weight value threshold used by the "Sweep Weights" command.
[Painter] Hide 3D manipulators if skin painter turned on: If enabled, this feature will hide the 3D gizmos while skin painting stage.
Allow to mirror weights on different skinned meshes: If enabled, even if the source point and the target point of the mirror do not belong to the same mesh, the algorithm still mirrors the source point at the target point.
Max inf.pr vtx: The Duo Skin algorithm and the Skin Painter algorithm will associate at maximum to each vertices the number of joint specified.
Low smooth strength (recommended for face): Strengh associated to the joint tagged as low in the picker. The strengh modifies the smoothing of the skinning. This is a Duo Skin preference.
High smooth strength (recommended for body): Strengh associated to the joint tagged as high in the picker. The strengh modifies the smoothing of the skinning. This is a Duo Skin preference.
Negligible inf: The weight below this value will be erased with the Duo Dkin algorithm and the Skin Painter algorithm.