Picker Window
- Aurélien Charrier
- Etienne Beschet
- Yannick Rousseau (Unlicensed)
- Cédric Vidal-Duvernet (Unlicensed)
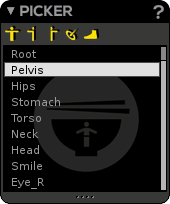
The Picker is the window listing the controllers of a layer (joints or IK targets only for the moment). That is the place to grab your controls!
By the way, depending on you are in the Animation or Rigging part the Picker handles some secondary features in specific contexts (Layer Edit mode, Duo Skin process, skin locked influences, etc.).
Quick Select features
 - Select all controls of the current layer.
 - Select all left controls of the current layer (left side naming convention).
 - Select all right controls of the current layer (right side naming convention).
 - Select all the IK targets of the current layer.
Picker navigation
- You may navigate through the Picker's list of controllers via the Up/Down arrow keys of your keyboard.
- You may select the Picker's first controller by pressing the Home key.
- You may select the Picker's last controller by pressing the End key.
Picker secondary features (Animation part)
Layer Edit Mode
You can activate or leave this mode by clicking on the  in The Mixer window , and only then, you'll be able to access these hammers too in The Picker window. When the current Layer's Edit Mode is enabled, the Picker shows all the character's controllers, allowing you to add or remove them as you wish.
In this mode, the hammer icons () appear to indicate controllers belonging to the current layer. Clicking on hammers allows you to add/remove controllers from the current layer.
Remove cautiously your controllers!
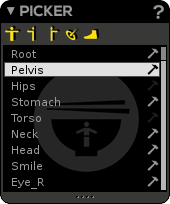
Picker secondary features (Rigging part)
In rigging part, the Picker has a few differences compared to its Animation counterpart:
- You can rename the controllers of the list (using F2 / double-clicking on their names / RMB clicking on their names).
- You may drag & drop controllers inside the list, for the purpose of re-ordering them.
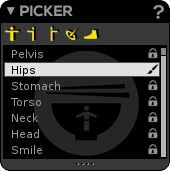
- Padlocks (
 ) are a reminder of the locked/unlocked state for the Skin Atelier. Joints not featured in the Skin Atelier display a padlock to remind that their weights shall remain untouched, preventing any accidental modification.
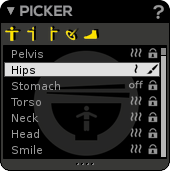
 - A brush icon (
 ) is displayed on the current joint to indicate that weight color feedback in the 3D viewport is associated to this particular joint.
 - The different smooth factors of the Duo Skin process are displayed in front of each joint.